
Free Foam Starter Checklist
Tell us where to send it and the full Foam Starter Checklist downloads instantly: what to buy, site requirements, setup steps, the safety brief, maintenance schedule, and a vendor shortlist including Foam Daddy.
Free operator download
Get the Foam Starter Checklist
A 5 page printable PDF: before you buy questions, the starter gear list, site requirements, the seven step setup, guest and operator safety rules, teardown and maintenance schedule, a vendor shortlist including Foam Daddy, and a break even worksheet.
Site Requirements & Load Out
Confirm these before you accept the booking, then load the trailer the night before.
Site must have
- A 20 ft by 20 ft grass, turf, or sealed concrete zone with a 5 ft clear perimeter
- A garden hose spigot within 100 ft of the foam zone
- A grounded 110V outlet on its own circuit within 100 ft
- Slope under 5 percent and drainage away from doors, patios, and pool decks
- No sprinkler heads, stumps, hard edges, or drop offs in the zone
- Written confirmation the surface may get wet and slippery for 2 to 4 hours
Load the night before
- Machine, tripod or stand, and every quick connect fitting
- Solution for the booked run time plus one spare jug
- Two 100 ft potable hoses, a splitter, and a repair coupler
- Two 100 ft 12 gauge cords and one GFCI adapter
- A frame rules sign, cones or tape, and a QR code yard sign
- Towels, squeegee, wet floor sign, first aid kit, and eye rinse
- Signed agreement, waivers, and a copy of your insurance certificate
Setup Procedure, Step by Step
Seven steps, in this order, at every single booking. Skipping a step is how operators end up with a claim.
Walk the site
Arrive 45 minutes early. Walk the zone with the client, mark the foam boundary, and point out where foam will drift and drain. Move furniture, cords, and electronics out of the drift path.
Set the perimeter
Cone or tape a 5 ft buffer around the zone. Place the A frame rules sign at the single entry point, and your yard sign where street traffic sees it.
Power and water
Run the extension cord on the dry side into a GFCI protected outlet, keep every connection off the ground, then pressurize the hose and check each fitting for leaks.
Position the machine
Mount the machine on a tripod or stand outside the perimeter, aimed downwind and slightly up. Never place it inside the play zone or where guests can reach the intake.
Mix the solution
Follow the manufacturer ratio exactly. Too rich clogs the machine and leaves residue, too thin gives you wet slop instead of stacking foam. Use only non toxic, non staining, hypoallergenic solution.
Test run
Run 30 to 60 seconds with no guests in the zone. Confirm foam quality and drift direction, and that nothing is spraying toward outlets, streets, or parked cars.
Safety brief
Gather guests and parents, read the safety brief out loud, and confirm an adult supervisor by name. Do not start the party until you get a verbal yes.
Foam depth rule: keep working foam between ankle and knee depth for mixed age groups. Deep foam hides feet, toys, and hard objects, and it is the most common cause of trips and lost items at foam events.
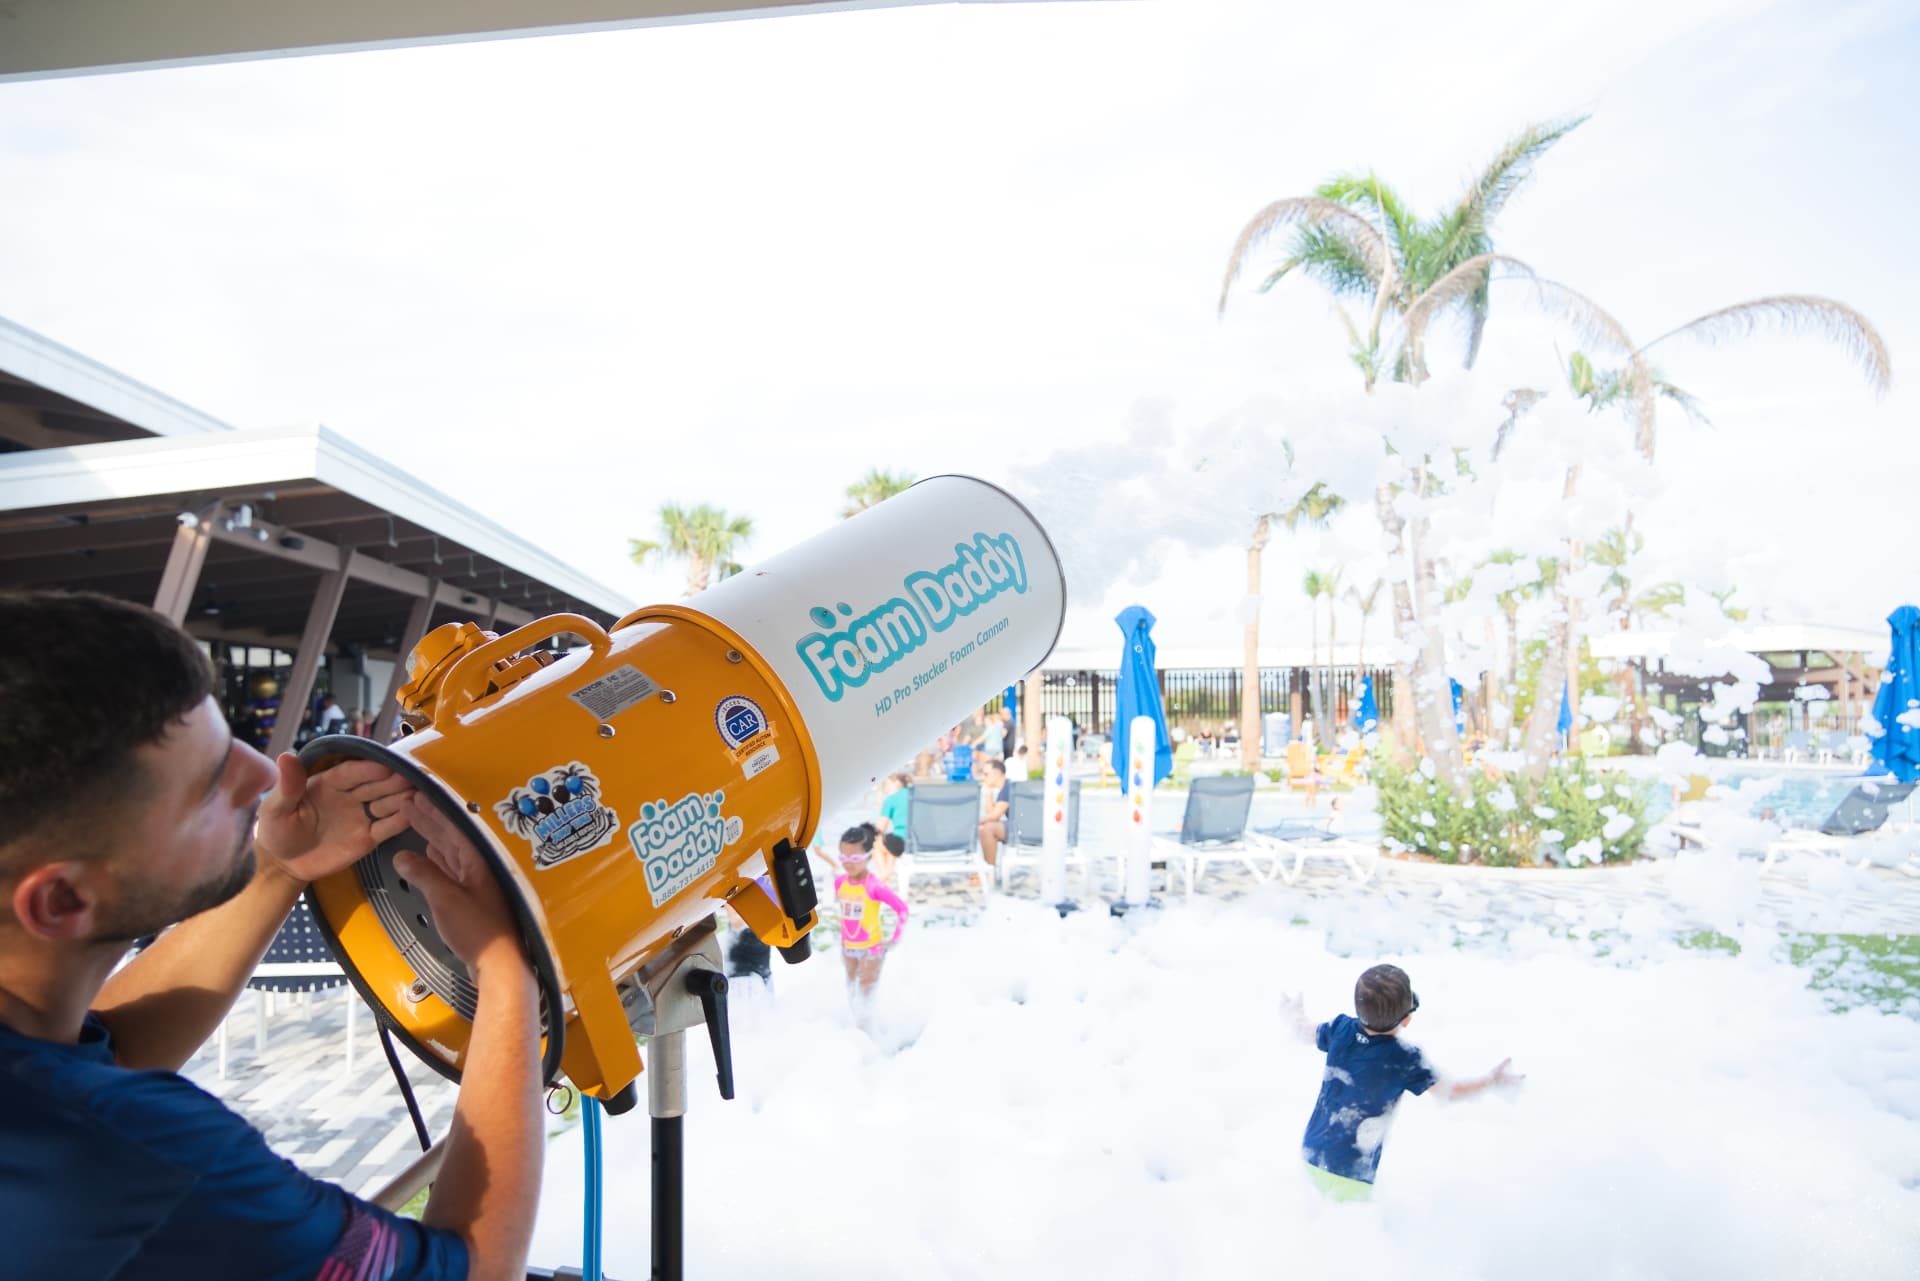
What It Looks Like Done Right
Photos from our own bookings, not stock images. This is what a compliant setup looks like on site.


Safety Procedures
Read the guest brief out loud before the machine starts. Hold yourself to the operator rules with no exceptions.
Guest safety brief
- Walk, do not run. The surface under the foam is slippery.
- No diving, no sliding headfirst, and no jumping into the foam.
- Bare feet or water shoes only. No street shoes, no cleats.
- Keep foam out of eyes and mouth. Rinse with clean water if it stings.
- No food, drinks, gum, or phones inside the foam zone.
- Stay out of the machine area, and never touch or aim the cannon.
- An adult supervisor stays in view of the zone the entire time.
- If someone falls, yell for the operator and we shut the machine down.
Operator rules
- Never leave a running machine unattended, even for 30 seconds.
- Shut down for injury, lightning, sustained wind over 15 to 20 mph, or a power fault.
- Never aim foam at faces, streets, pools, stairs, or electrical equipment.
- Keep the electrical side of the setup dry and uphill from the zone.
- Keep working foam between ankle and knee depth for mixed age groups.
- Log every incident, near miss, and early shutdown the same day.
Do not book it, or shut it down
No foam on unsealed hardwood, indoor gym floors without written approval, tile entryways, or above ground pool decks. No foam within 10 ft of open water unless the client provides a lifeguard. No machine on a generator that is not rated for the pump draw. Above roughly 15 mph wind you lose control of the drift, and above 20 mph you shut down and reschedule. Put your wind and rain policy in the rental agreement so the call is not a negotiation on site.
Teardown & Maintenance
The 20 minutes after a booking decides whether your pump lasts five seasons or five months.
Teardown, in this order
- Shut down and let the foam settle before anyone walks the zone.
- Sweep the zone for lost shoes, glasses, phones, jewelry, and toys.
- Flush the machine with clean water until it runs clear.
- Drain and dry the pump, lines, and fittings, then cap the connections.
- Coil hoses and cords in figure eights and stow them off the floor.
- Rinse and squeegee any hard surfaces the client asked you to protect.
- Walk the site with the client and get a verbal sign off.
Never load a machine you did not flush. Dried solution is the number one cause of pump failure and a denied warranty claim.
Maintenance schedule
- After every event
- Flush with clean water, drain lines, dry fittings, wipe the housing, and inspect the cord and plug.
- Weekly in season
- Clean or replace the intake filter, check fittings for leaks, test the GFCI adapter, and top off supplies.
- Monthly in season
- Inspect the pump for pressure loss and unusual noise, check hoses for cracks, tighten hardware, recheck your mix ratio.
- End of season
- Deep flush, full pump service per the manufacturer schedule, replace worn seals and filters, store indoors above freezing.
- Annually
- Order the manufacturer parts kit, replace wear items on schedule, and review warranty coverage and your insurance rider.
Keep Going
Pair the SOP with the buying math and the operations playbook.
Foam Equipment & Pricing
Cannons, snow machines, solution, and the ROI calculator for your first machine.
OpenFoam Cannon Buying Guide
Output ratings, pump duty, warranty red flags, and payback math before you buy.
OpenFoam Party Operations Guide
Zone selection, mixing ratios, run schedule, pricing, and marketing your foam add on.
Open